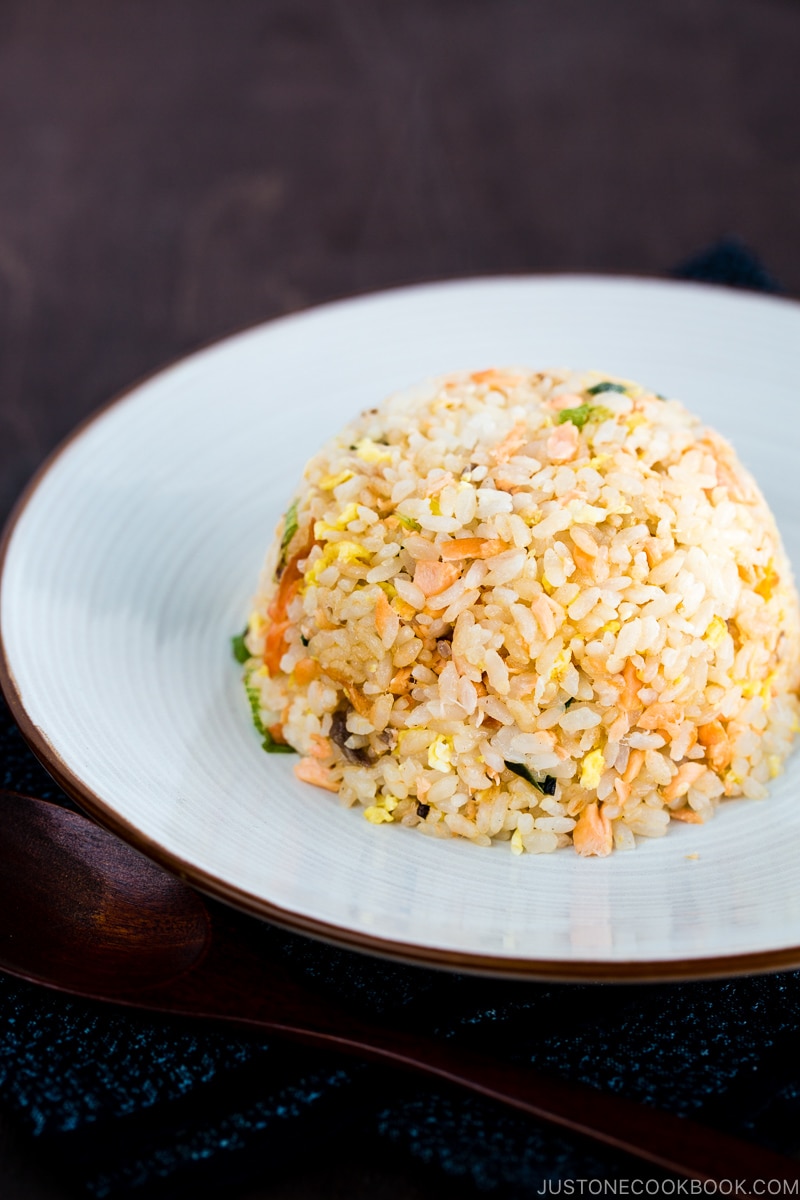
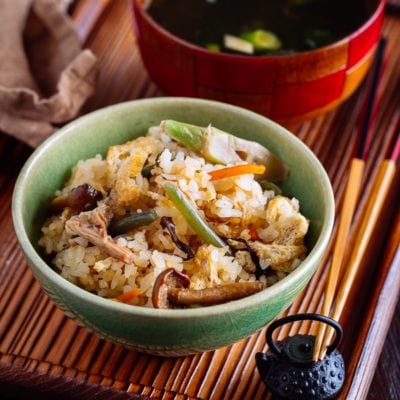
With just a handful of ingredients – leftover rice, salted salmon, eggs, and scallions, you can cook up this delicious one-pan Salmon Fried Rice. Plenty of flavor to a meal in under 30 minutes.
Typically when we have a “Japanese” dinner at home, one of the dishes is usually a baked or grilled fish. My children love all kinds of fish, from Hamachi Kama (yellowtail collar) to Miso Cod. One of their favorite baked fish is Salted Salmon (Shiojake/Shiozake). Sometimes when we have leftover, I would use it to make Salmon Fried Rice the next day. It is one of the most convenient and satisfying ways to cook a one-pan meal for the family.
Use Salted Salmon for Fried Rice
The prep work for Japanese Salted Salmon recipe is very simple. All you need is salmon, sake, and salt. You rub salt over the salmon and let it sit in the refrigerator for 2 days.

What if you want to make Salmon Fried Rice now and don’t want to wait for 2 days? Well, you can make a quick version of salted salmon by sprinkling salt on the fresh salmon and baking it before making the fried rice.
Fried Rice Cooking Tips
Since salted salmon is the star of the show for this fried rice, we keep the rest of the ingredients simple with just a light touch of seasonings.
To prevent the fried rice from turning mushy, you want to use day-old rice when cooking. It is also best cooked in a wok with small servings, preferably one to two portions at a time. This is to make sure every grain of the rice is evenly fried yet retains its fluffiness. Heat the wok until it is smoking hot and then swirl in a good amount of oil before adding in the rest of the ingredients. This way the eggs and the rice will not stick to the bottom of the wok.
Minimal prep work, quick to pull together, and deeply satisfying, this salmon fried rice meets all the requirements for a fast weeknight meal that you will enjoy.
Wish to learn more about Japanese cooking? Sign up for our free newsletter to receive cooking tips & recipe updates! And stay in touch with me on Facebook, Pinterest, YouTube, and Instagram.

Salmon Fried Rice
Ingredients
For the Salted Salmon
- 1 skin-on salmon fillet (4 oz, 120 g; I use salmon from a Japanese grocery store, so it‘s a thinner cut; you can use leftover salted salmon (shiojake) for this recipe)
- ¼ tsp Diamond Crystal kosher salt
For the Fried Rice
- 1 green onion/scallion
- 1–2 large eggs (50 g each w/o shell)
- 2 Tbsp neutral oil
- 1 Tbsp roasted sesame oil
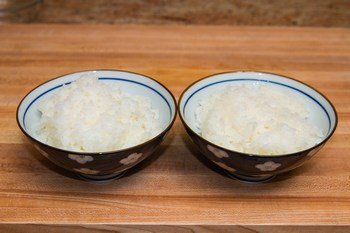
- 2 servings cooked Japanese short-grain rice (preferably day old rice; 1 rice-cooker-cup (180 ml) yields roughly 2 servings (1.75 US cups); see how to cook short-grain rice with a rice cooker, a pot over the stove, an instant pot, or a donabe)
- 1 tsp soy sauce
- ¼ tsp Diamond Crystal kosher salt (to taste)
- ⅛ tsp white pepper powder (to taste)
- ⅛ tsp freshly ground black pepper (to taste)
Instructions
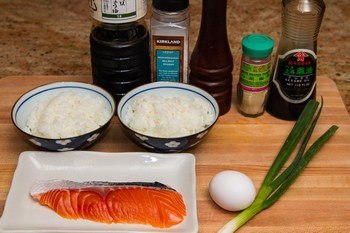
- Gather all the ingredients. I do not recommend cooking fried rice for more than 2 servings, especially if you‘re new to making fried rice. The ingredients need some space to move around inside the wok, and the wok gets heavy for you to lift and to shake.
To Make the Salted Salmon
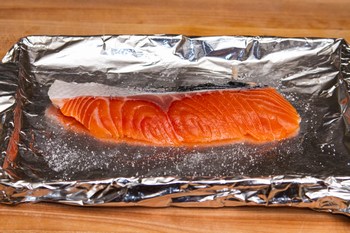
- If you don‘t have the leftover salted salmon, we‘ll make a simplified version today. Preheat the oven or toaster oven to 400ºF (200ºC) and line the baking sheet with aluminum foil. Quickly rinse the salmon under running water and pat dry with a paper towel. Sprinkle ¼ tsp Diamond Crystal kosher salt on both sides of 1 skin-on salmon fillet and bake at 400ºF (200ºC) for 15–20 minutes (cooking time may vary depends on thickness).
- Discard the skin and break the salmon into small pieces.

To Prepare the Ingredients
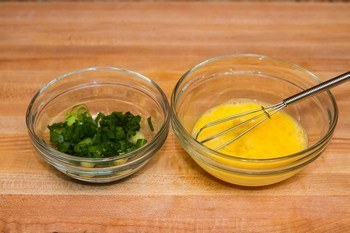
- Chop1 green onion/scallion into small pieces and beat 1–2 large eggs (50 g each w/o shell).
- If you are using rice from the freezer, warm it up in the microwave.
To Cook Fried Rice
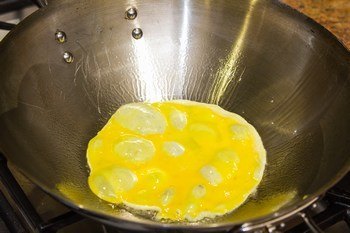
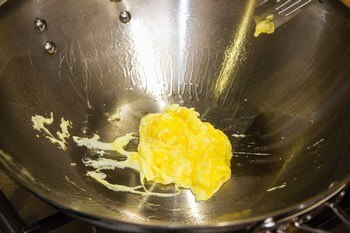
- Heat the wok over medium-high heat. When it’s getting hot, add 2 Tbsp neutral oil. When you see white smoke coming off from the wok, add the beaten egg to the wok. The egg will not stick to the pan as long as you put enough oil.
- Quickly mix it with spatula and when it’s 80% cooked, take it out and put on a plate.
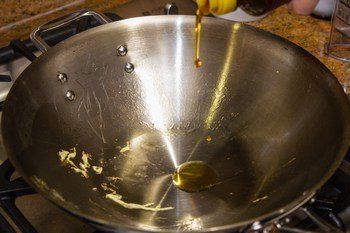
- Keep wok on medium-high heat and add 1 Tbsp roasted sesame oil.
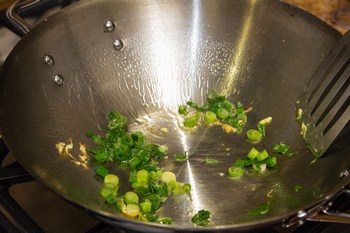
- Add the green onions and stir-fry until nicely coated with oil.
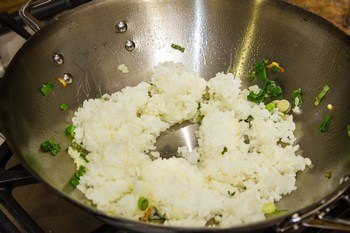
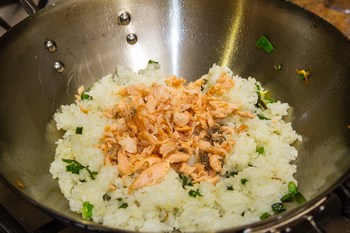
- Add 2 servings cooked Japanese short-grain rice and break the chunk of rice. Toss the wok (which is why you don’t want to put too much rice) so the rice will fry out and mix well together.
- When rice is coated with oil, add the shredded salmon and toss the wok again.
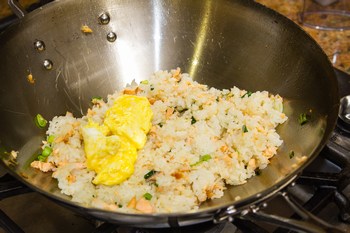
- Add the egg back into the wok and break it into small pieces.
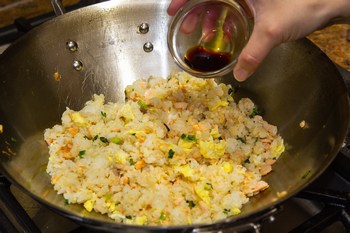
- When all the ingredients are mixed well, add 1 tsp soy sauce, ¼ tsp Diamond Crystal kosher salt, ⅛ tsp white pepper powder, and ⅛ tsp freshly ground black pepper.
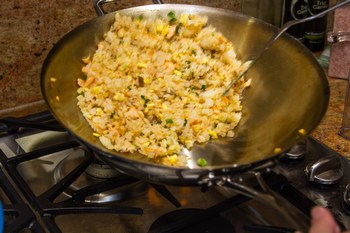
- Toss the wok again and mix it all together.
- You can fill up a bowl with fried rice and transfer to a plate. Serve immediately.
To Store
- You can keep the leftovers in an airtight container and store in the refrigerator for 3 days or in the freezer for a month.

Great recipe! My boyfriend and me loved it! Now we don’t have to go out to eat for salmon fried rice! Thanks
Hi Monica! Thank you so much for your kind feedback!
We are so happy to hear you and your boyfriend love Nami’s Salmon Fried Rice recipe!🥰
I cooked this for my family and they love it
This is an easy to follow recipe
Thank you 😊
Hi Jeannie! WOW!🤩 Salmon Fried Rice looks so delicious!👏🏻
Thank you very much for trying Nami’s recipe and sharing your photo and cooking experience with us!
We are so happy to hear your family enjoyed it too.
I followed the salty salmon method n used it for fried rice. V easy n super tasty 😋
Thank u
this was so easy and delicious! thank you for sharing!! i had some beef fat that I used to cook the egg in. But I added sesame oil afterwards to cook the spring onions and the rice, as instructed in the recipe. Worked really well! Thank you for this recipe! We’re such big fans!
Hi Melissa! Thank you very much for trying Nami’s recipe and sharing your cooking experience with us!❤️
Hi Nami, I made this today and it was a hit. I tossed in some shrimps and green peas that needed to be used, but otherwise I followed the instructions. It was delicious. Thank you for another exemplary recipe. I’m addicted to your blog and I’m very grateful for your step by step instructions, which help me cook Japanese food, something I was always afraid to attempt. Bless you 😃
Hi Nany, You have no idea how much your kind words meant to us! Thank you very much for trying many recipes and for your love and support! 💕
Ive made this three times. First time with new rice and it was just too sticky, second time I forgot the sesame oil and it was okay. Third time (eating it right now) and this turned out excellent, day old rice and prepared the salmon ahead of time. This is an excellent recipe and the flavor is excellent. This is the first time I’ve ever made fried rice I was happy with. Nami is making me a better cook. どうもありがとうございます
Hi Eric!
Thank you very much for trying this recipe! We are so happy to hear that you enjoyed this dish, and you became an expert for this recipe!
Yes. We prefer using day-old rice for this recipe too. The texture is much better! どうもありがとう〜
Need to be able to print recipes, not everyone can look at this in the kitchen.
Hi James,
You may print this recipe by clicking the “PRINT” button under the recipe card’s picture. 😉
As always.. awesome, straight forward and practical recipe! Your style is is so consistent that it’s really helped me to get a grasp of Japanese cooking. I’ve been a fan for about a year now.
Using my leftover salmon and left over rice, I tossed this recipe into the wok for lunch. I was out of green onion, but finely chopped yellow onion worked beautifully. I’m huge on any sort of onions in fried rice. Perfection.
I learned from you that using too many ingredients in fried rice can really take away from the dish in the end. So true! You illustrate that again through this simple recipe that’s exploding with flavor.
Your food makes me so happy!
Hi Ima! Thank you for your kind words! Wow I’m so happy to hear that you enjoy cooking with my recipes. It meant so much to me! 🙂 Happy Holidays!